Adventures in SuperComputing - Summer Teacher Institute
Dreamweaver Fundamentals
Planning Phase
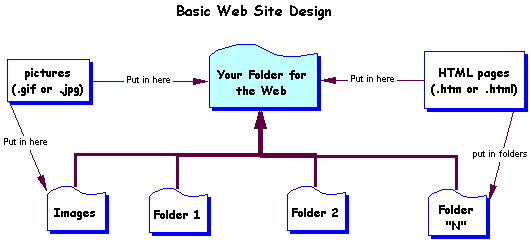
This class includes instruction on the fundamental site management concepts that are needed in order to construct an overall Web site, including file and folder organization. This class utilizes Dreamweaver MX Software for the planning stage, as participants build a working map for their own Web site.

It also encompasses information on planning for individual pages, including page layouts, design basics and required information needed for Web sites in the Adventures in SuperComputing Challenge. Finally, the overall stages of Web site Construction are presented to give the participant a framework to follow for the future.
In Dreamweaver MX, you will need to become familiar with three basic tools that will aid you in developing a Web site with functional Web pages.
- The Insert Toolbar - This is where you can put elements or common objects onto your page. These objects can be graphics, tables, links and much more. The toolbar is usually located at the top of the Dreamweaver window, just under the File pull down menus.
- The Property Inspector - This tool allows you to assign values for attributes in HTML for the objects that appear on your page. It also will change depending on what you have selected. It displays text properties most often by default.
- The Site Manager - This is the tool for tracking local and remote site files. You will set up a local site that is housed in a local root folder, and then use the Site manager to connect to the server in order to put your files up on the Internet. Dreamweaver has an FTP function that will allow you to move files from your local to the remote (PUT) and from the server back to the local folders on your machine (GET).
See Macromedia Dreamweaver Reference Text - Chapters 1 and 2
